DIY Ford F-150 Rear Seat Delete Platform Build
Goose Gear Inspired Storage Platform for Tools, Pets, Camping, and Wheelchair Accessibility
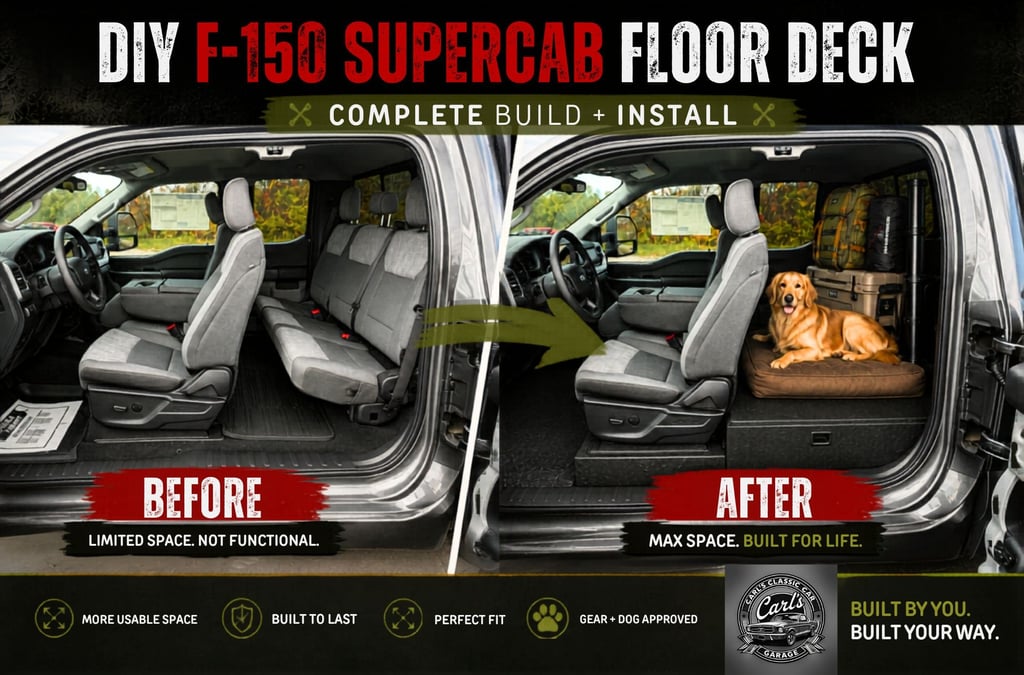
If you saw my recent video on removing the rear seat from my Ford F-150 Super Cab, this is the follow-up build where I start constructing the raised storage platform and rear wall system.
The goal of this project was simple:
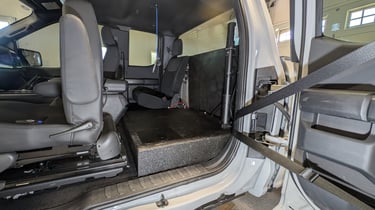
I needed a completely flat floor in the rear of the truck with maximum space.
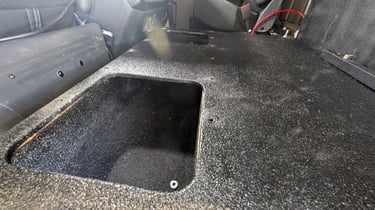
What started as a simple seat delete quickly turned into a full custom platform build inspired by the Goose Gear systems you see in overlanding and expedition vehicles. Instead of spending thousands on a pre-made setup, I decided to build my own version using plywood, 2x6 supports, threaded inserts, cubby storage, and bed liner coating.
This setup could work for a lot of different people:
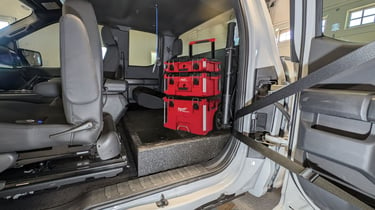
Contractors needing secure tool storage
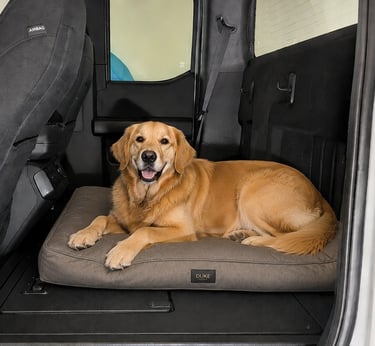
Dog owners wanting a flat rear area for pets
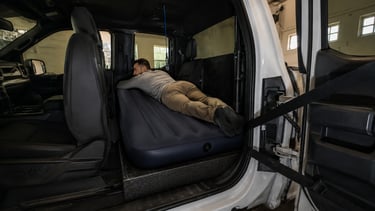
Overlanding or camping builds
Mobile work trucks
Hunting or fishing gear storage
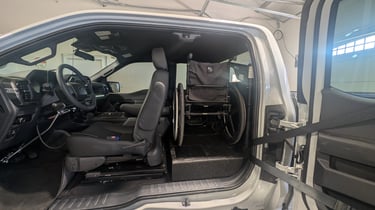
Or in my case, improved wheelchair accessibility and wheelchair lift storage
Why I Built This
For me personally, this build was all about accessibility.
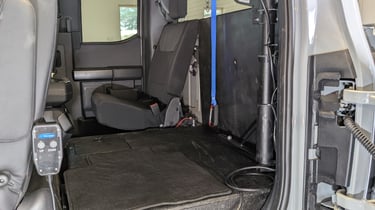
I’ve been working on improving how I transport my wheelchair inside the cab of my truck. The factory rear floor in the F-150 has a large rise behind the seat area, and that bump makes it difficult to slide a wheelchair into place cleanly.
By creating a raised subfloor, I can:
Keep the wheelchair level
Gain additional clearance behind the driver seat
Mount a wheelchair hoist system
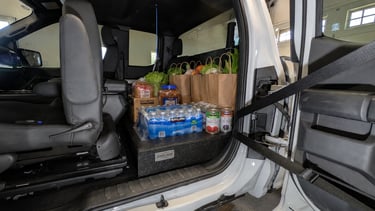
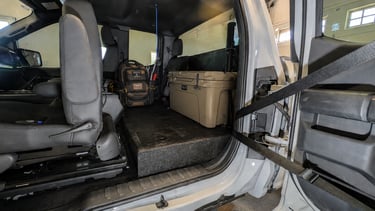
Create hidden storage underneath the floor
Add future upgrades like a subwoofer and amp
Molle panel for additional accessories
At the same time, I wanted the finished product to look clean and factory-inspired rather than just throwing plywood in the back of the truck.
Why Not Just Buy a Goose Gear Kit?
Goose Gear makes some really impressive products, and they were definitely part of the inspiration for this build.
Their systems are modular, clean-looking, and well engineered. If you want a complete bolt-in setup and don’t mind the price, they’re worth checking out.
For me though, I wanted:
Lower cost
Custom sizing
Accessibility modifications
Hidden cubby storage
Flexibility for future upgrades
The satisfaction of building it myself
This project ended up costing only a fraction of what a pre-built setup would cost.
Truck Information
This build was done on:
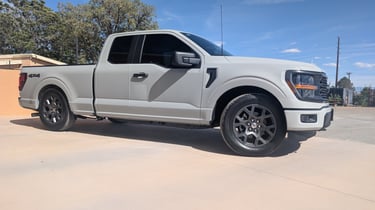
2026 Ford F-150 Super Cab
Rear seat delete configuration
Keep in mind:
A SuperCrew full 4 door truck will likely require different measurements.
Materials Used
1/2" Birch plywood
2x6 lumber supports
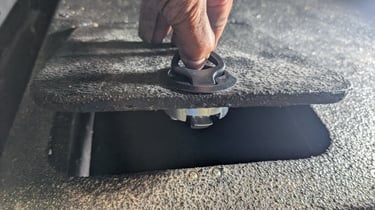
Threaded inserts
Allen head bolts
Riv nuts
Herculiner bed liner coating
Primer
Barrel nuts
Cubby latches
Miscellaneous brackets and hardware
Tools Used
Circular saw
Router with ½” round-over bit
Orbital sander
Drill and countersink bits
Riv nut tool
Clamps
Level
Rubber mallet
I’ll continue updating this post with exact product links and hardware details as I finalize the setup.
Platform Dimensions
These measurements are specific to my truck and setup.
Main Floor Panel
38.5" deep
32" wide
Back Wall Panel
37.5" long
26" tall
2 each 2x6 boards cut to 37.5" long
Cubby Compartments
Approximately 10" x 10"
Important:
These dimensions may vary depending on:
Seat position
Interior trim
Super Cab vs SuperCrew
Accessibility equipment
Personal preference
Always measure your own truck carefully before cutting materials.
Lessons Learned During the Build
This is probably the section that would have helped me most before starting the project.
1. Leave More Clearance Than You Think
At several points during the build I tried making everything extremely tight and precise.
That turned into:
Scratched trim
Hard installation
Frustration fitting pieces into place
If I were doing it again, I would leave slightly more clearance around:
Seat brackets
Interior panels
Door pockets
Plastic trim
You can always hide small gaps with trim or edge finishing later.
2. Spray Bed Liner Wasn’t My Favorite
I used spray-on Herculiner for the first coats.
The finish actually looked pretty decent, but:
The nozzle clogged constantly
Coverage was limited
It used way more product than expected
If I did this again, I would seriously consider:
Roll-on bed liner
Using a foam roller
Applying thicker coats manually
You will end up with way more coverage using the 1 gallon Hurculiner
I think it would:
Save money
Provide thicker coverage
Be easier to touch up later
3. Threaded Inserts Were Worth It
One thing I’m really happy with is making the platform removable and easy to disassemble.
Instead of using drywall screws permanently, I installed threaded inserts and used Allen bolts throughout the build.
That allows:
Easy disassembly
Future modifications
Cleaner appearance
Better long-term durability
It also gives the build a much more professional look.
4. Test Everything Before Final Paint
I dry-fitted nearly every component multiple times before final coating and assembly.
That ended up saving me several headaches because:
Some brackets interfered
Some clearances changed
Some measurements evolved during the build
Once bed liner goes on, adjustments become harder.
Hidden Cubby Storage
One of my favorite parts of this build is the hidden storage underneath the platform.
The cubbies are perfect for:
Ratchet straps
Tools
Jumper cables
Flashlight
Recovery gear
Pet supplies
First Aid kit
Miscellaneous equipment
I also intentionally kept sections removable for future wiring access.
Future Upgrades
This project is still evolving.
Future plans include:
Powered subwoofer install
Amplifier mounting
Sound deadening
Milwaukee PACKOUT mounting system
Molle Panels
Improved wiring management
Final hardware refinements
I’ll likely create additional videos and blog updates as the build progresses.
Final Thoughts
Overall, I’m extremely happy with how this project turned out.
The platform is:
Solid
Functional
Modular
Clean looking
Easy to service
Much more useful than the factory rear seat setup for my needs
Most importantly, it solved the accessibility problem I originally started with.
If you’re considering building your own rear seat delete platform, hopefully this write-up helps save you some time, frustration, and trial-and-error.
And if you haven’t seen the full build video yet, make sure to check it out on the videos below:
I’ll continue updating this article with:
Product links
Hardware details
Additional measurements
Future upgrades
Lessons learned after long-term use
click the button below to go to my products
and parts list for this build
As an affiliate, i may earn a small commission at no additional cost to you
Here are the videos associated with the seat delete and the floor deck build
please like and subscribe to the videos and feel free to add any comments, i would love to hear from you!


CARL'S CLASSIC CAR GARAGE
Dedicated to preserving automotive history through restoration and sharing knowledge with fellow enthusiasts.


A Division of CCCG Media, LLC